Automatic Merge Conflict Resolution in the next ExamDiff Pro |
The next version of ExamDiff Pro will feature automatic merge conflict resolution, giving users the option to automatically choose the Left, Center, or Right file in case of a merge conflict and also to mark the conflicts as resolved automatically.
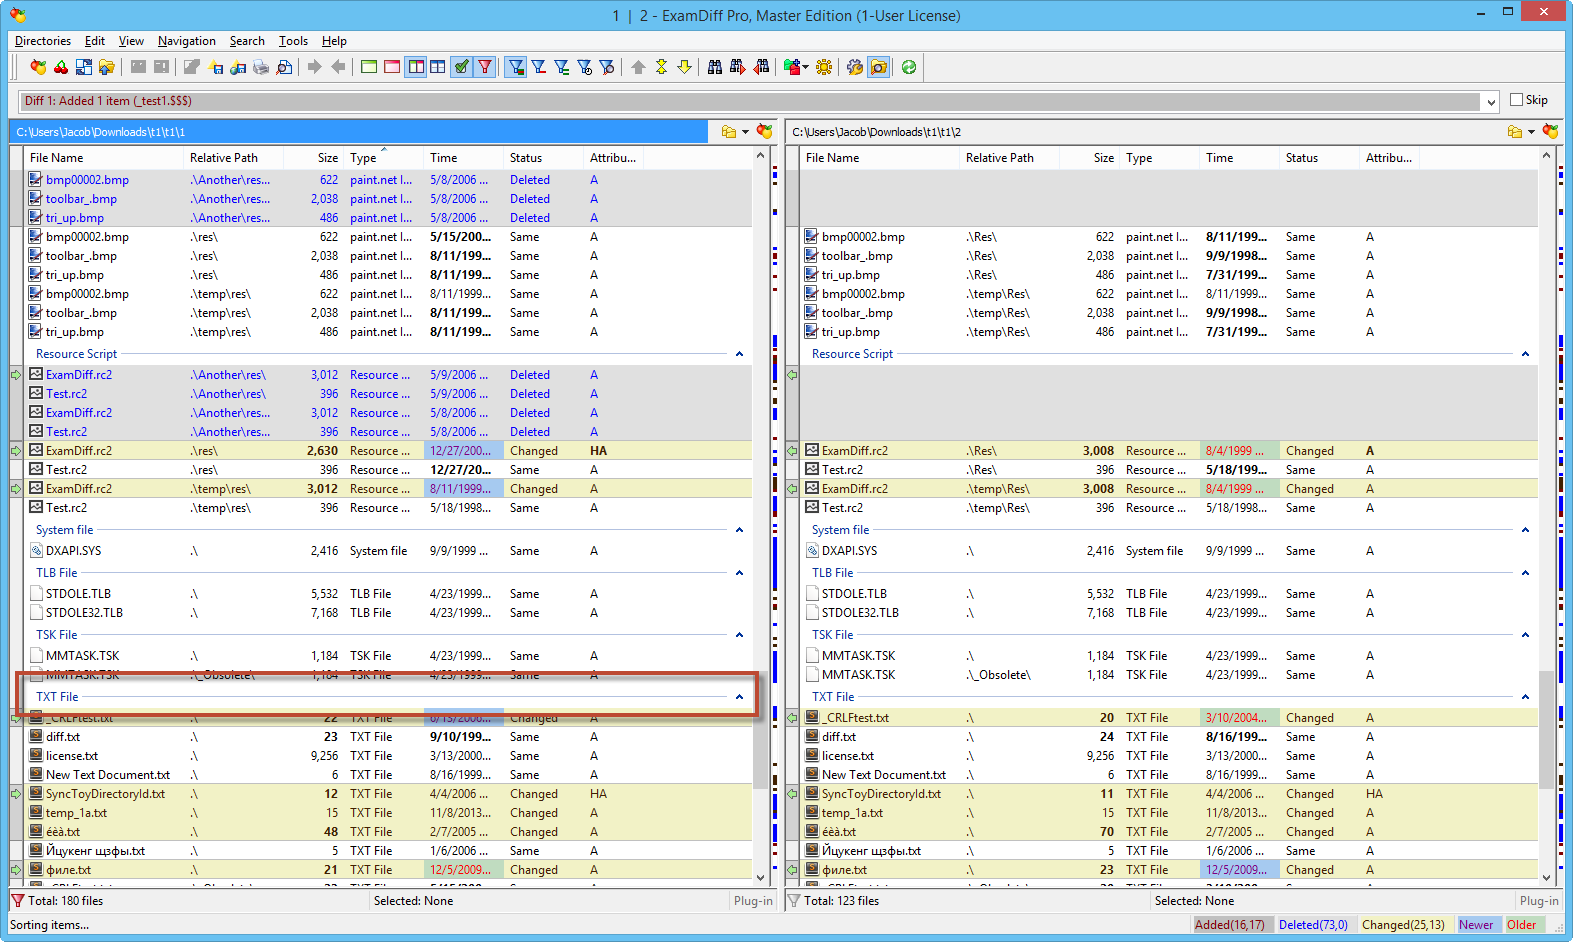
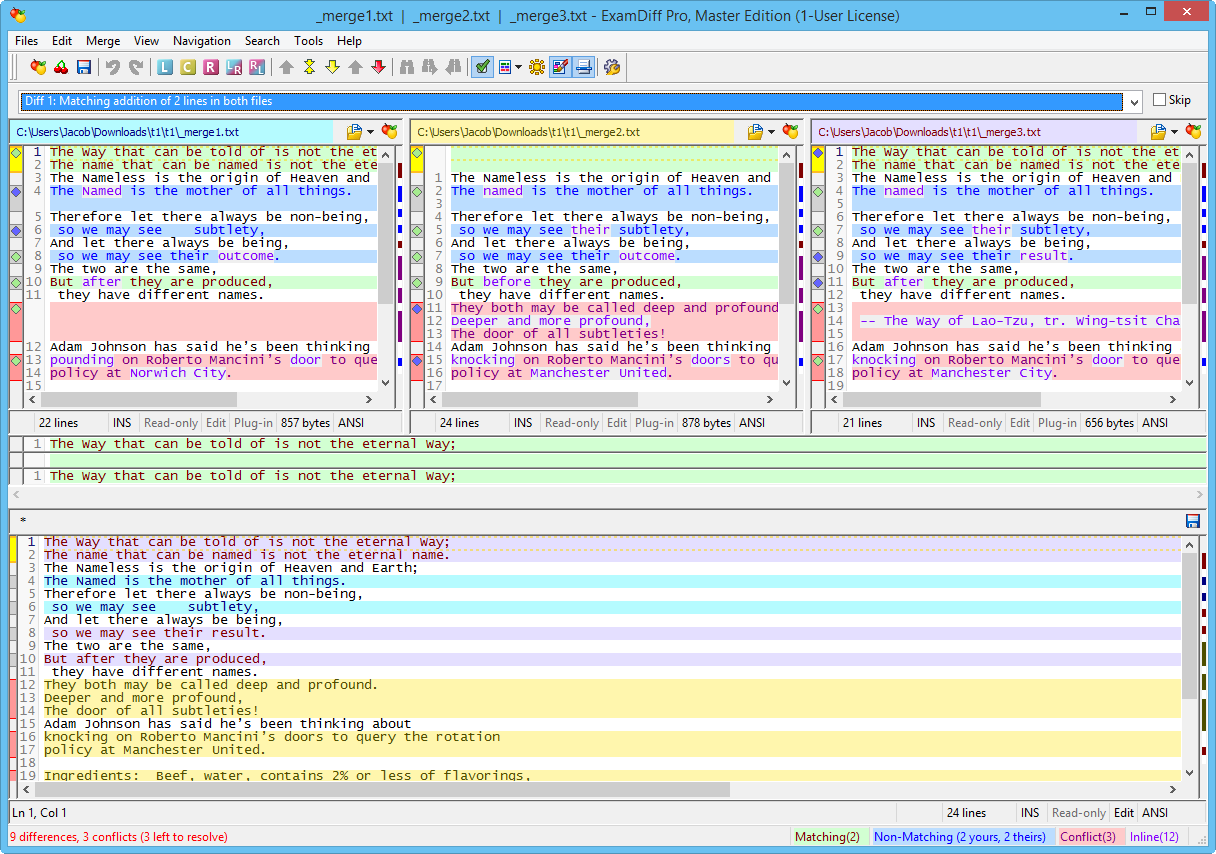
By default, ExamDiff Pro will use the Center file for merge conflict resolution and will not mark the conflicts as resolved. An example of the default merge settings in a three-way merge is shown below:

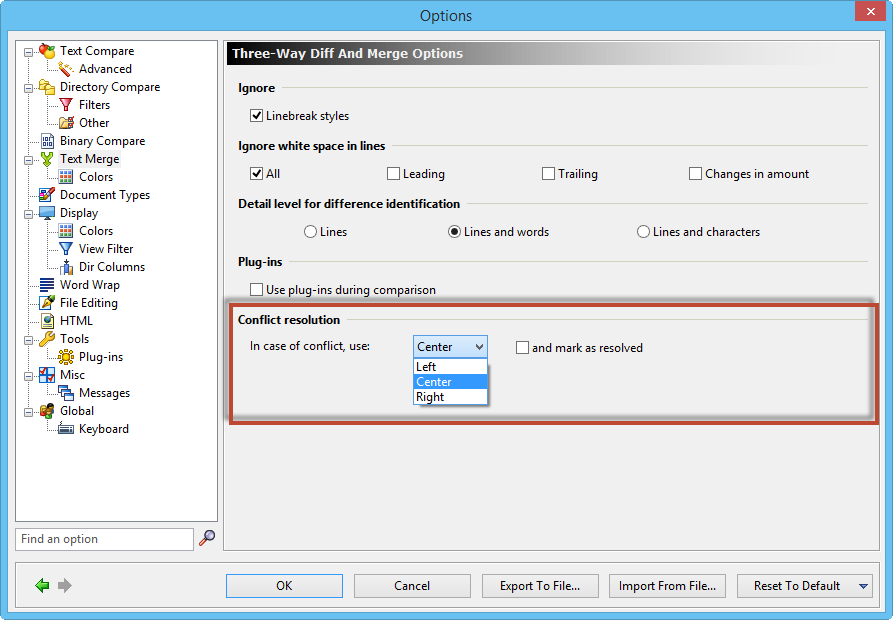
In order to change this behavior, you can simply go to the options dialog through Tools | Options and choose the desired settings under the Conflict Resolution section of the Three-Way Diff and Merge Options menu. In this section, you can select which file to automatically favor in case of a merge conflict and optionally to mark all such conflicts as resolved. The settings in their default state are shown below:

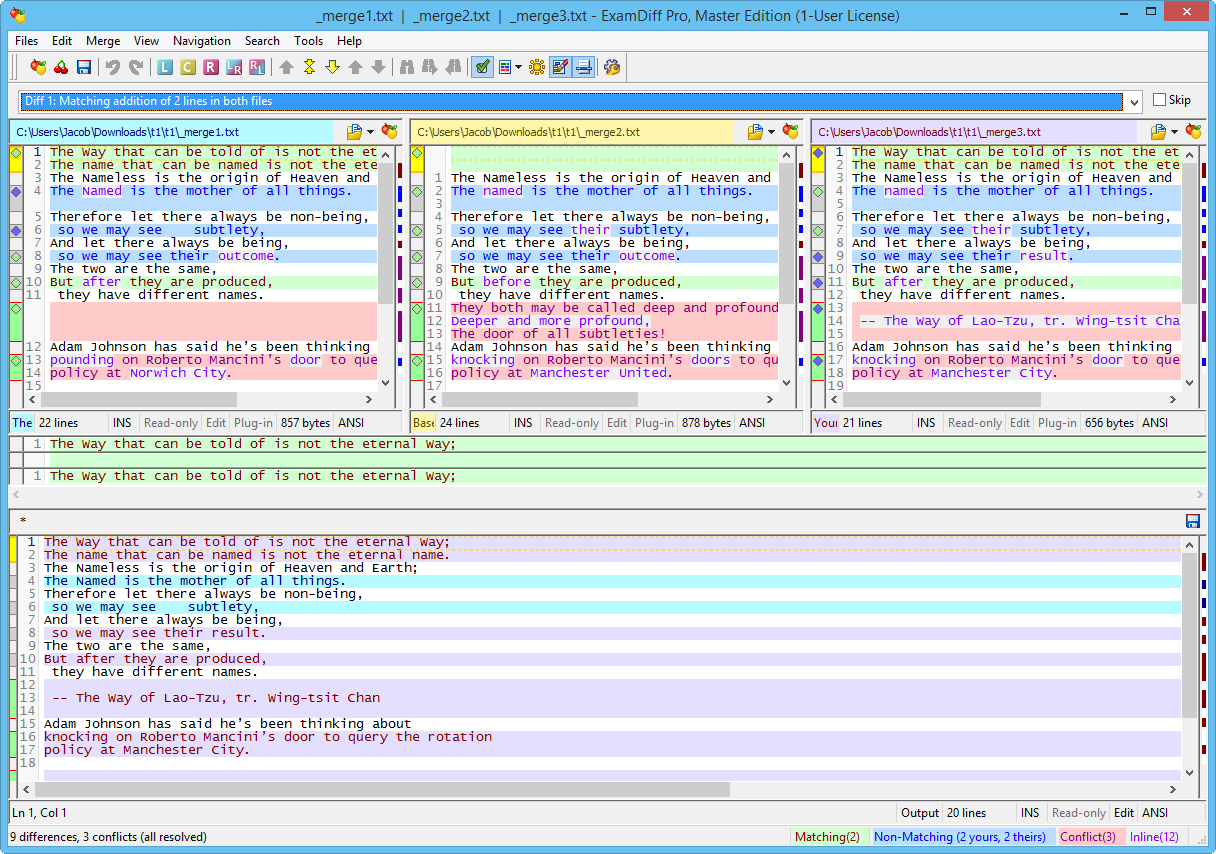
We can now select the Right file to be favored by default and mark merge conflicts as resolved. The results of these option changes after a new comparison are shown below, with the colors in the merged output corresponding to that of the Right file and the conflicts marked as resolved in the status bar on the bottom:

Since you are most likely to use three-way diff and merge from the command line, each of these new options can be triggered with a simple command line option as shown below:
The
By default, ExamDiff Pro will use the Center file for merge conflict resolution and will not mark the conflicts as resolved. An example of the default merge settings in a three-way merge is shown below:
In order to change this behavior, you can simply go to the options dialog through Tools | Options and choose the desired settings under the Conflict Resolution section of the Three-Way Diff and Merge Options menu. In this section, you can select which file to automatically favor in case of a merge conflict and optionally to mark all such conflicts as resolved. The settings in their default state are shown below:
We can now select the Right file to be favored by default and mark merge conflicts as resolved. The results of these option changes after a new comparison are shown below, with the colors in the merged output corresponding to that of the Right file and the conflicts marked as resolved in the status bar on the bottom:
Since you are most likely to use three-way diff and merge from the command line, each of these new options can be triggered with a simple command line option as shown below:
C:\Users>examdiff /merge C:\1.txt C:\2.txt C:\3.txt /preselect:1 /autoresolve
/preselect command lets you choose which file to use for merge conflicts by default where 1 is Left, 2 is Center (default), and 3 is Right. The /autoresolve command counts these automatic preferences as resolutions. As such, the command listed above will merge the three files, prefer the Left file and consider this preference a resolution to the merge conflict.Labels: ExamDiff Pro, Features